The following installation instructions apply to the Buyer Feedback application for Salesforce API version 50.0.
Review the application technical details here: Technical FAQ
Note: If you have a previous version of the Buyer Feedback app installed (v3.2 or before), please uninstall that package first before installing this version.
Sandbox Environment
If you are installing the Buyer Feedback application in a Salesforce sandbox environment, use the following link: Sandbox Installation Link
Production Environment
If you are installing the Buyer Feedback application in a production environment, use the following link: Production Installation Link
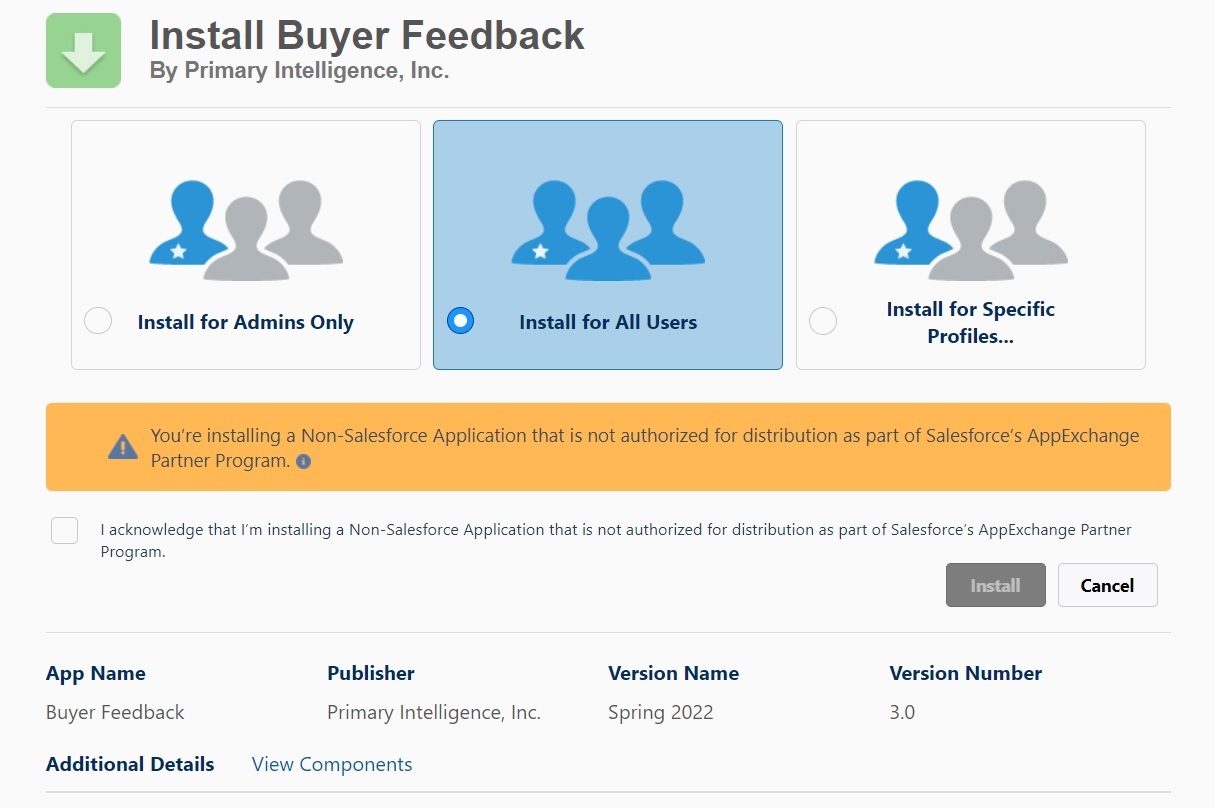
There are three options you’ll be presented with when installing the application:
- We recommend installing for All Users, which means all users will get the necessary Salesforce permissions needed to view the feedback in the Account and Opportunity views you enable.
- You can install for Admins Only and use the included “Buyer Feedback Permissions” permission set to manually set permissions for users (not recommended)
- You can install for Specific Profiles and set those profiles to “Full Access” to have the installation set the appropriate permissions for all users with those profiles (not recommended)
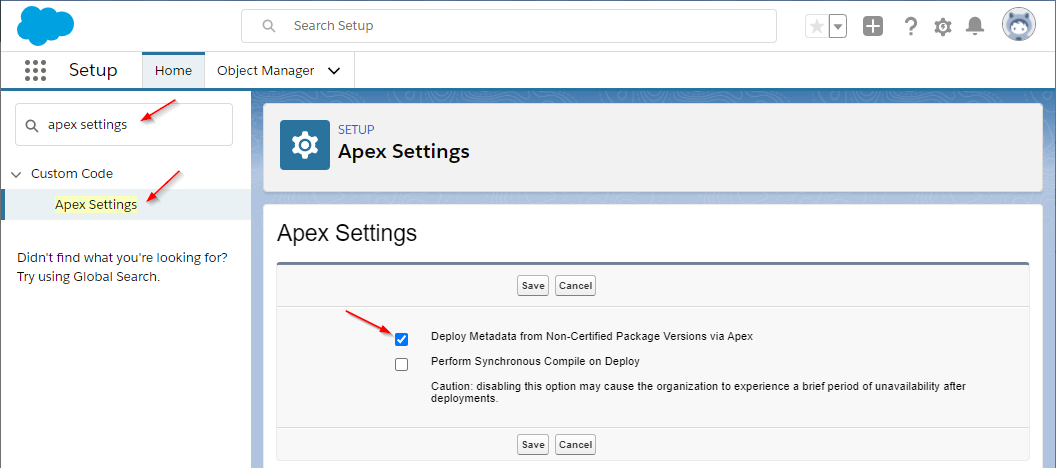
Once the installation process has been completed, you need to enable the “Deploy Metadata from Non-Certified Package Versions via Apex” Salesforce setting:
- In Salesforce setup, type “apex settings” in the Quick Find control and click on the “Apex Settings” link.
- Enable the “Deploy Metadata from Non-Certified Package Versions via Apex” checkbox
- Save your changes
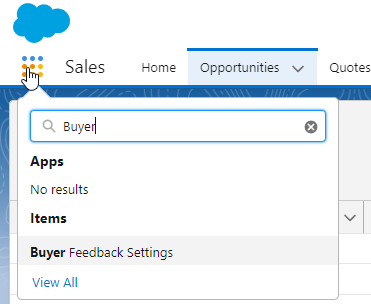
Once the installation is completed, navigate to the “Buyer Feedback Settings” view:
- Click the Salesforce App Launcher and type “buyer” in the search control
- Select the “Buyer Feedback Settings” option
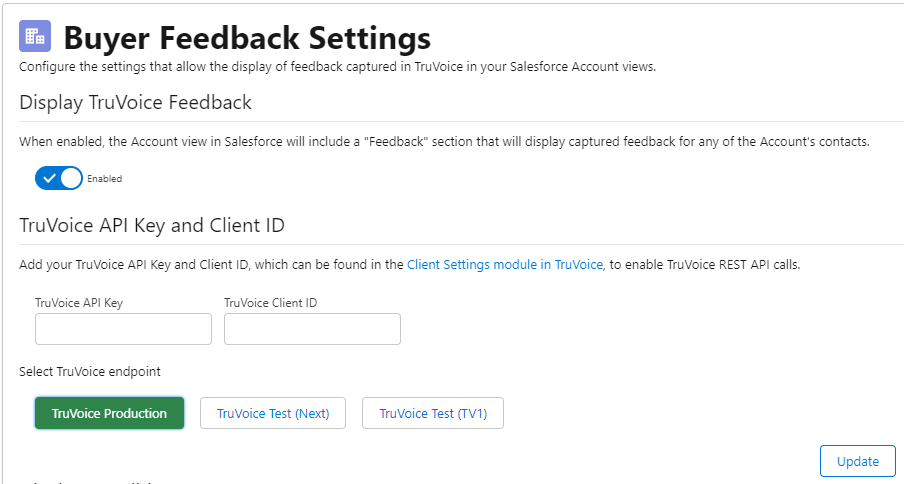
Update the following settings:
- Add your TruVoice API Key and Client ID
- Note: You will get this information from your Corporate Visions representative
- For the TruVoice endpoint select “TruVoice Production”
- Click the “Update” button
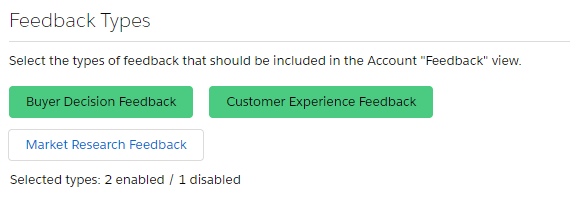
Select the feedback types you want to display in Salesforce:
- “Buyer Decision Feedback” is the feedback captured in your win loss analysis programs
- “Customer Experience Feedback” is the feedback captured in your customer experience programs
- “Market Research Feedback” is feedback captured in other program types
add_accountfeedback_to_account
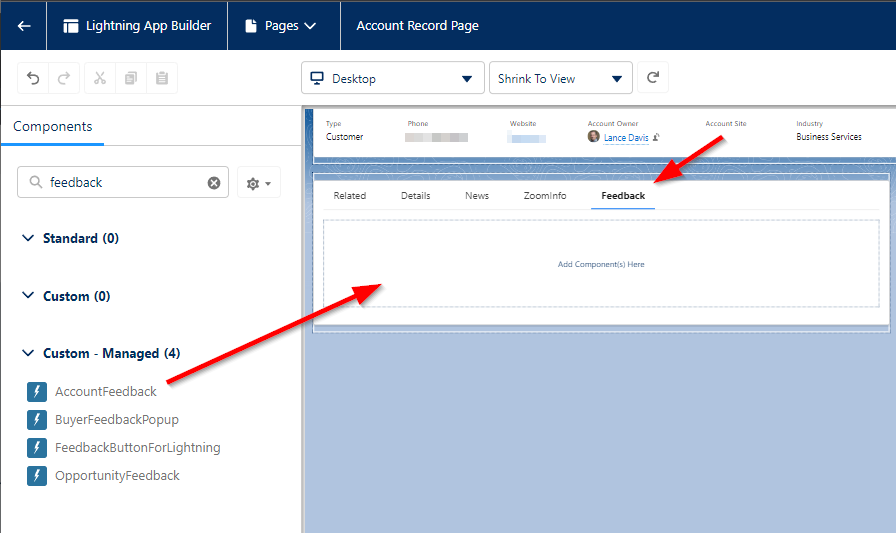
Display Buyer Feedback on Account, Opportunity and/or Contact Layouts (Lightning)
There are three feedback components you use to display buyer feedback on your Account, Opportunity and Contact layouts:
- First create a new “custom” tab on your Account (or Opportunity or Contact) layout and give the tab a name (e.g. “Feedback”).
- To display buyer feedback on your Lightning Account layouts, add the “AccountFeedback” component to the new custom tab on the Account layout and save the layout.
- To display buyer feedback on your Lightning Opportunity layouts, add the “OpportunityFeedback” component to the new custom tab on the Opportunity layout and save the layout.
- To display buyer feedback on your Lightning Contact layouts, add the “ContactFeedback” component to the new custom tab on the Opportunity layout and save the layout
To verify you have installed the package correctly, open an Account, Opportunity or Contact that has at least one contact that has previously provided feedback and click on the new custom tab to see a summary of the feedback captured for the account or opportunity.
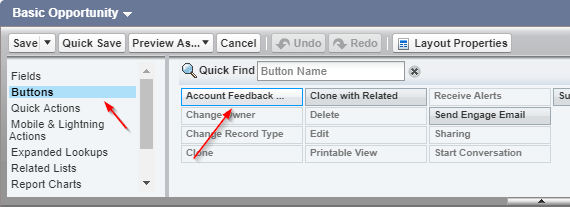
Display Buyer Feedback on Account and/or Opportunity Layouts (Classic)
There are several options for displaying buyer feedback in Salesforce classic Account and Opportunity layouts:
- Add the “Account Feedback” button to the Account or Opportunity layout and update the button label to “Show Feedback”. When users click this button it will display a pop-up of all related buyer feedback.
- To see buyer feedback on your Account layouts, add the Visualforce page “AccountFeedbackPage” to your Account layout.
- To see buyer feedback on your Opportunity layouts, add the Visualforce page “FeedbackForClassic” to your Opporutnity layout.
- Set the properties for both the “AccountFeedbackPage” and “FeedbackForClassic” Visualforce pages to the following:
- Set the width to 100%
- Set the height to 400 pixels
- Enable the “Show Scrollbars” option
Both the button and Visualforce pages can be used together or separately for either Account or Opportunity layouts.
To verify you have installed things correctly, open an Account or Opportunity with at least one contact that has previously provided feedback. You should now be able to see that feedback.
You have completed the installation steps. See the screenshots below for what to expect with the Buyer Feedback application installed.
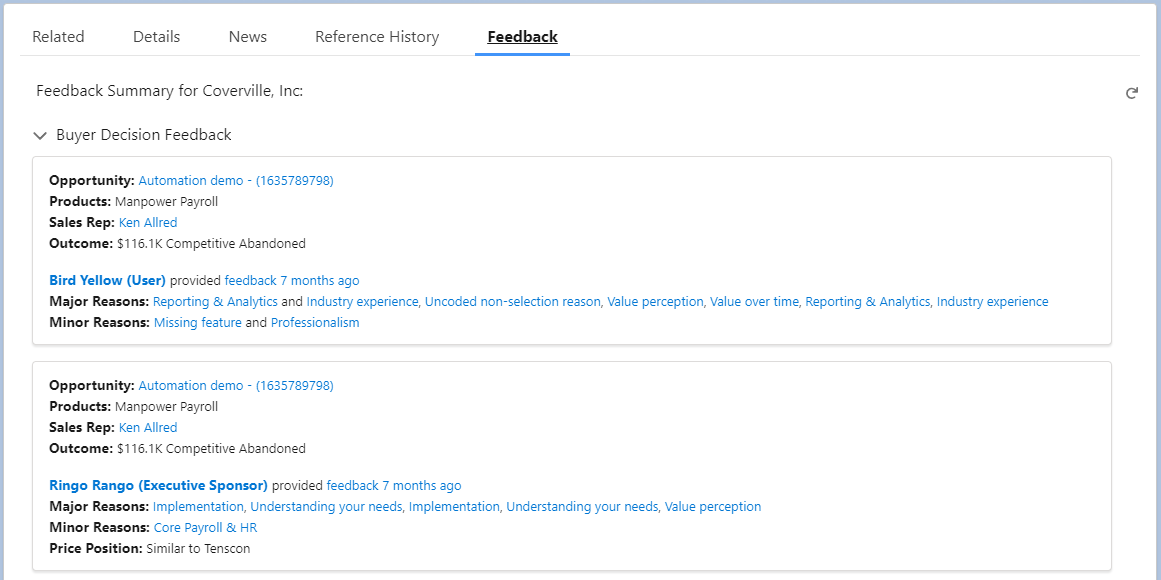
Buyer Feedback
When the Buyer Feedback application is able to identify feedback in TruVoice for the selected account, the Feedback tab will display a summary of the feedback for each contact associated with the Account (or Opportunity).

No Buyer Feedback for Account
When the Buyer Feedback application is not able to find feedback for the selected account, the Feedback tab will display a message that no feedback has been found for the account.

No TruVoice Account
When the “Restrict buyer feedback display to active TruVoice users” setting is enabled in the Buyer Feedback application settings, users without an active TruVoice user will be unable to view any buyer feedback and, instead, will see a message indicating they do not have an active TruVoice account.
Next, you'll need to configure TruVoice for your Salesforce Environment.